
Step-by-Step Guide
1. Organize Tasks Using Kanban Boards
Visualize tasks and track their progress seamlessly.
Instructions:
- Navigate to the Boards section in Atarim.
- Drag and drop tasks across columns representing statuses: Open, In Progress, Pending Review, and Completed.
- Filter tasks by assignee, project, or priority.
Tip: Use the Kanban board daily to identify bottlenecks and reassign tasks as needed.
2. Assign Tasks to Team Members
Ensure accountability with task ownership.
Instructions:
- Open a task inside Inbox or Board, and click Assign Team Member.
- Select a team member who should be managing the that task.
- The platform will send notification to the person via email
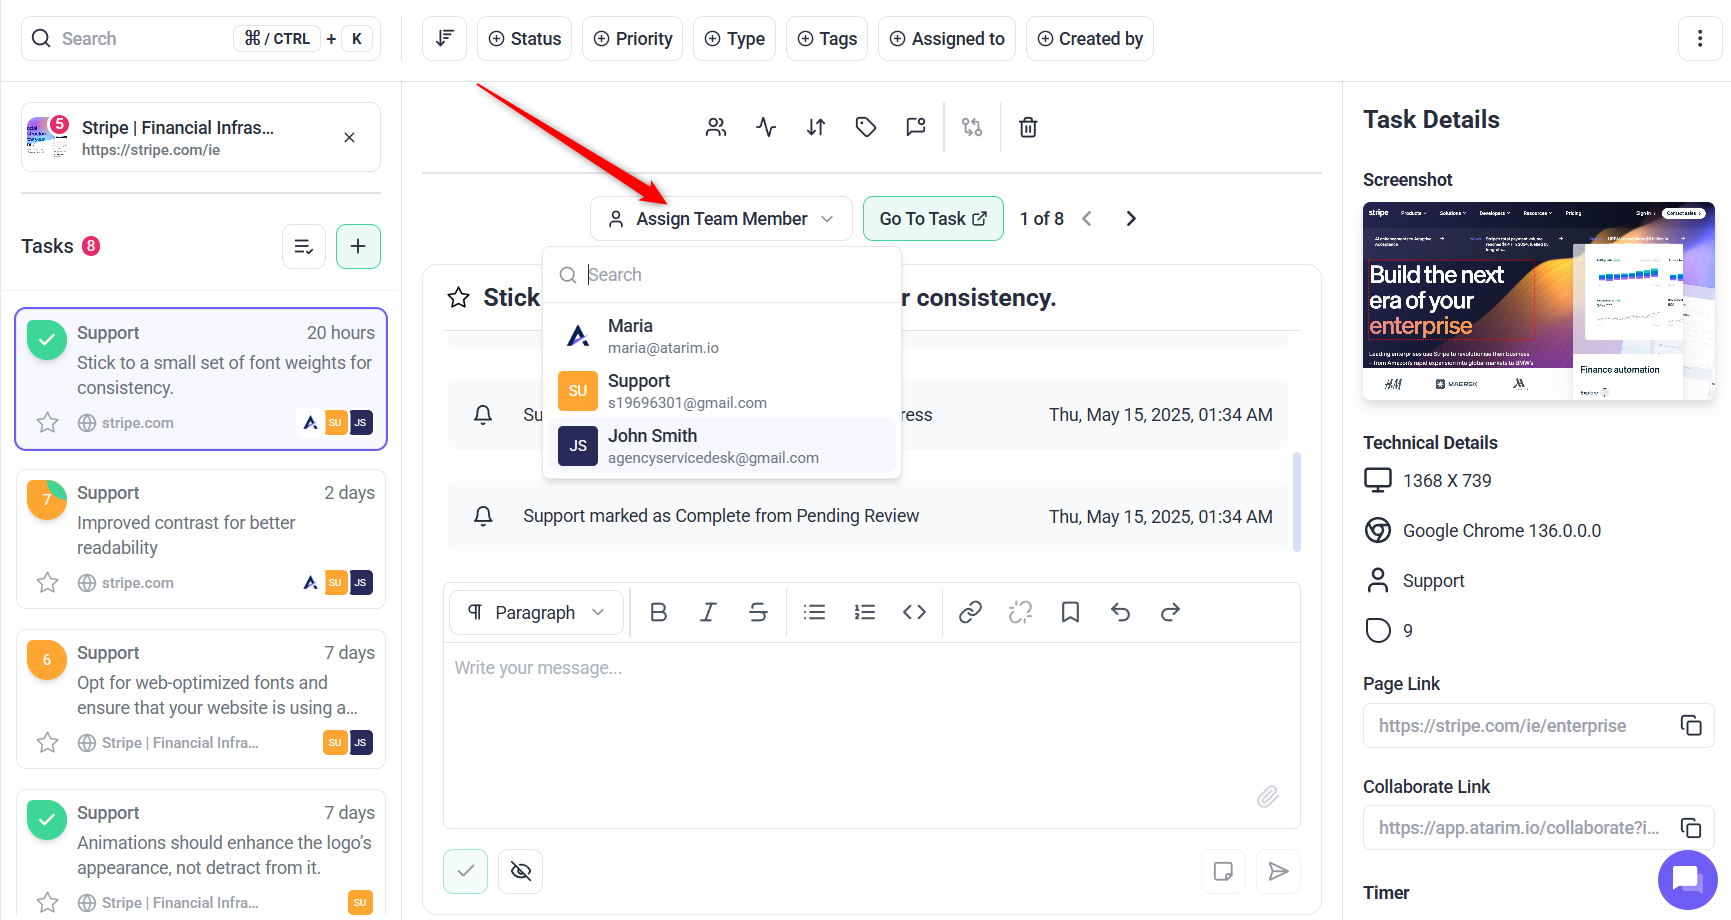

Warning: You can only assign tasks to users who are part of the project. If someone doesn’t appear in the “Assign Team Member?” dropdown, it means they haven’t been added to the project yet.
3. Change Task Title
You can also change the task title at any time to keep your task list clear, descriptive, and easy to manage.
Instructions:
- Open the task from the Inbox or Boards view.
- At the top of the task panel, locate the task title field.
- Click into the title — it will become editable.
- Type your updated task name.
- Press Enter or click outside the field to save your changes.

Tip: Match tasks to team member’s strengths to improve efficiency.
4. Update Task Status
Keep the team informed of task progress. Atarim sends email notification whenever task is transitioned to different status. All the team members assigned to the task will get the notification.
Instructions:
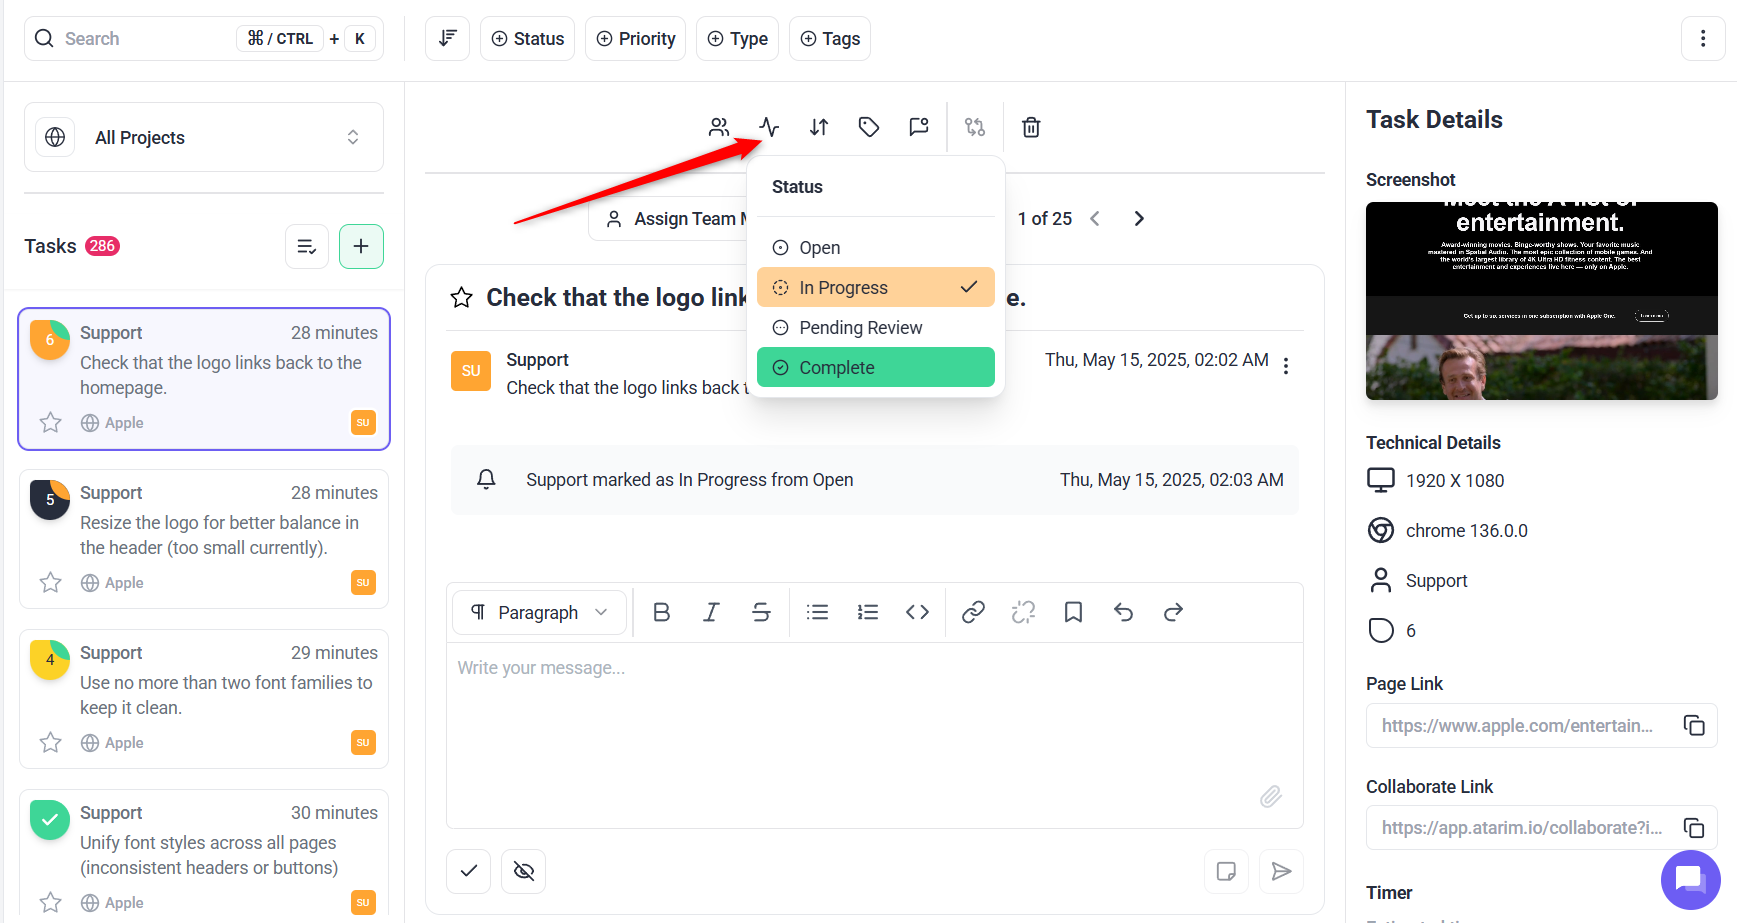
- Open the task inside Inbox or Board view.
- Change the status to Open, In Progress, Pending Review, or Completed.

Tip: Regularly update task statuses to prevent miscommunication.
5. Set Priorities
Focus on what matters most. Tasks marked as critical will be put in a column on the boards, ensuring you know which tasks you need to deal with first.
Instructions:
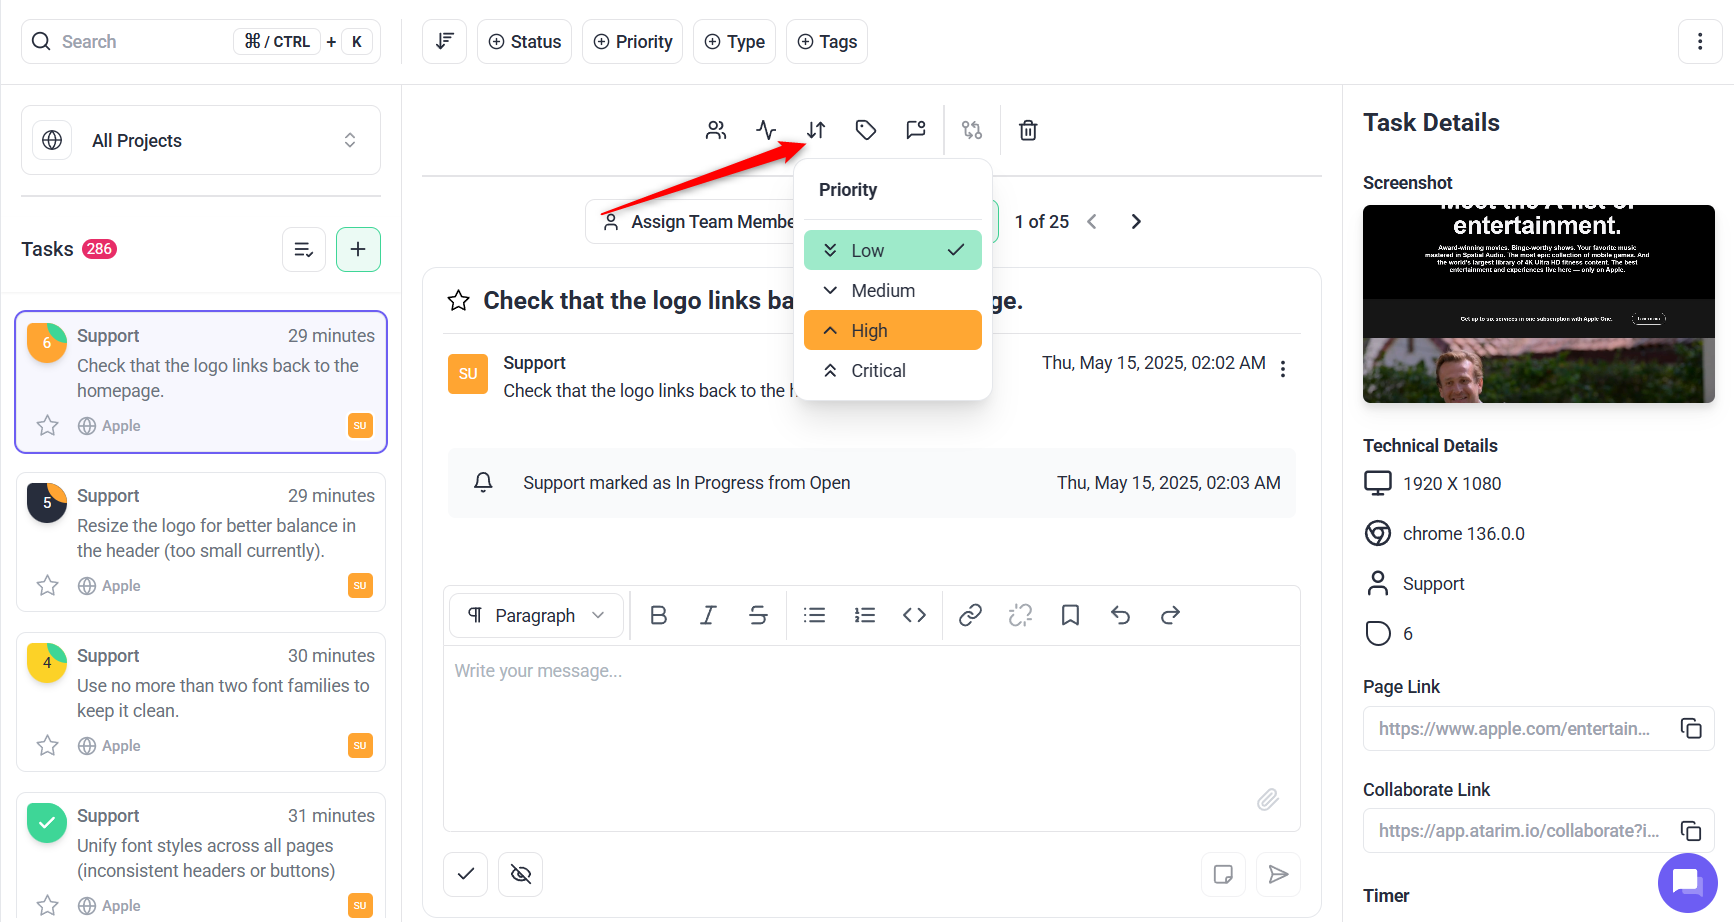

Tip: Align priorities with project deadlines to ensure timely completion.
6. Collaborate with Comments
Facilitate seamless team communication.
Instructions:
- Use threaded comments within tasks to resolve queries.
- Mark task as internal to allow only team members to view it
- Add comment as ‘note’ to only allow team members to see that comment.
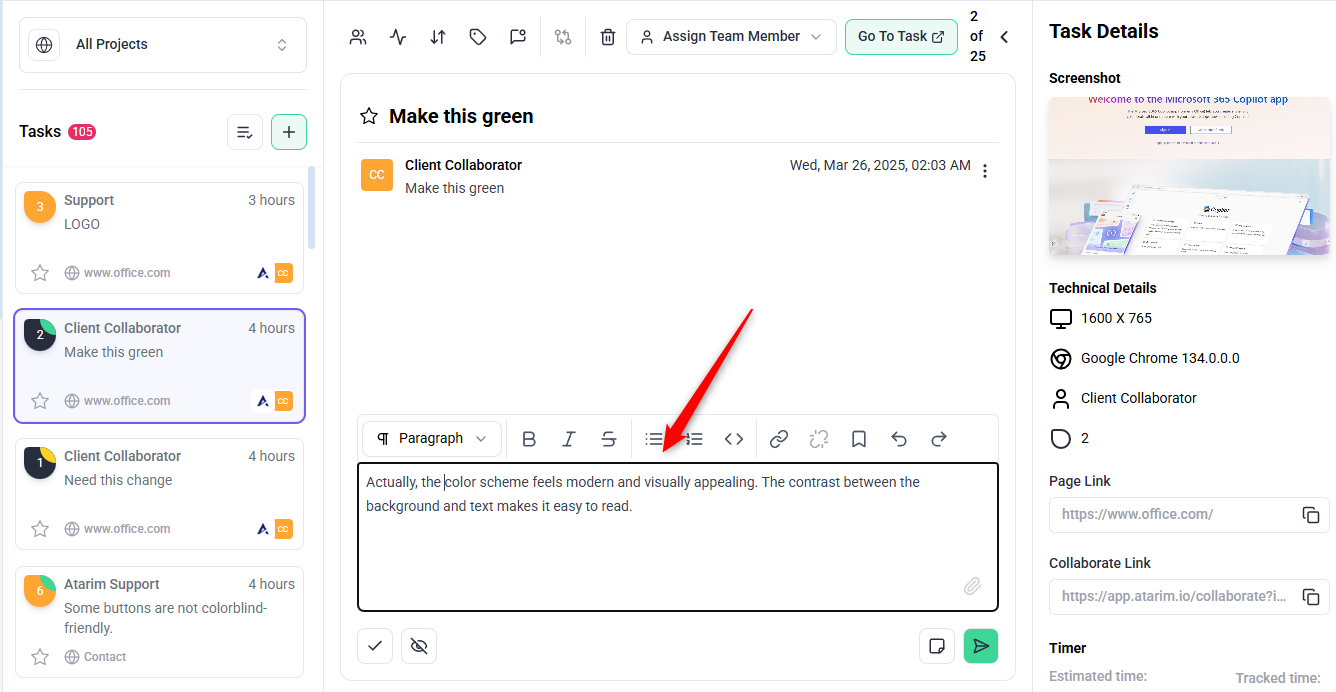

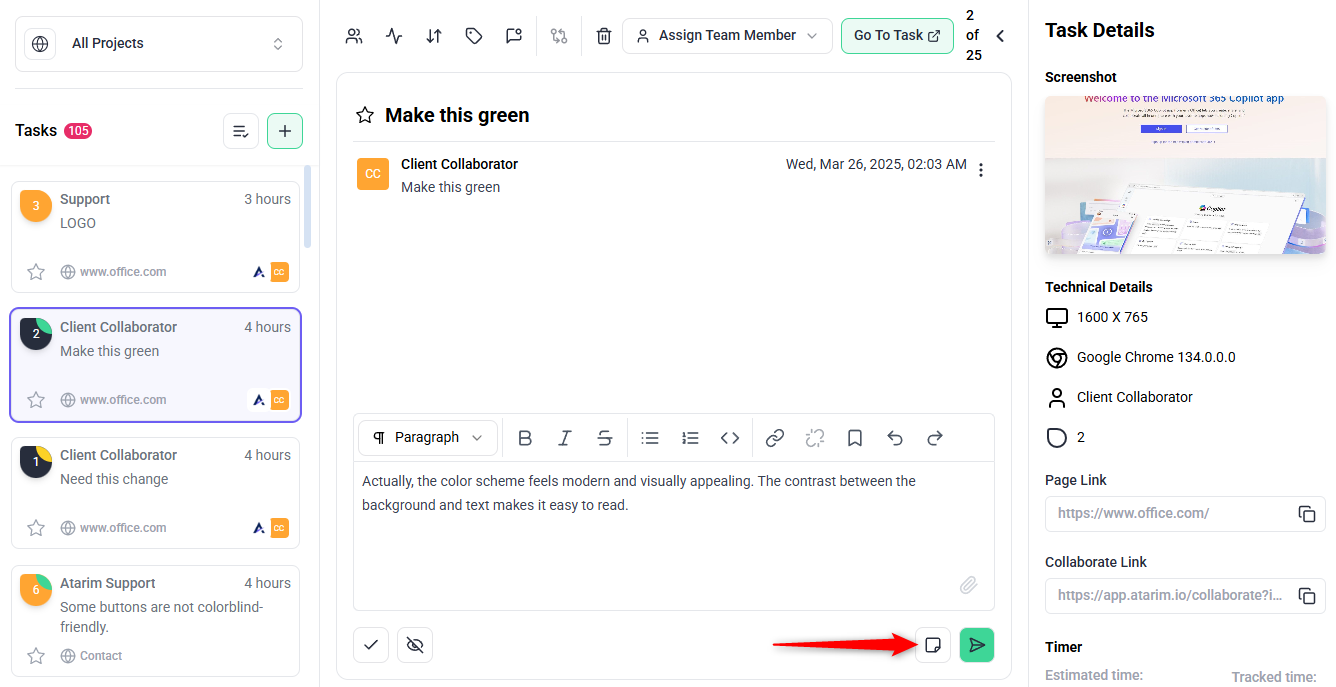
Tip: Use the Internal/Notes option for private team discussions.
7. Add Tags to a Task
Organize tasks by type, topic, or priority.
Instructions:
- Open your Atarim Inbox
- Click the task you want to categorize
- In the task details window, locate the Tags section
- Click Add Tag
- Type a new tag name or select one from the existing list

Tip: Use tags like Bug, Revision, or Client Feedback to make sorting and reporting easier.
8. Bookmark a Task
Flag important tasks so you can find them easily later.
Instructions:
- Open the task panel
- Click the Bookmark icon at the top of the task
- The task will now appear in your Bookmarked Tasks filter

Tip: Bookmark tasks that require follow-up or review during meetings.
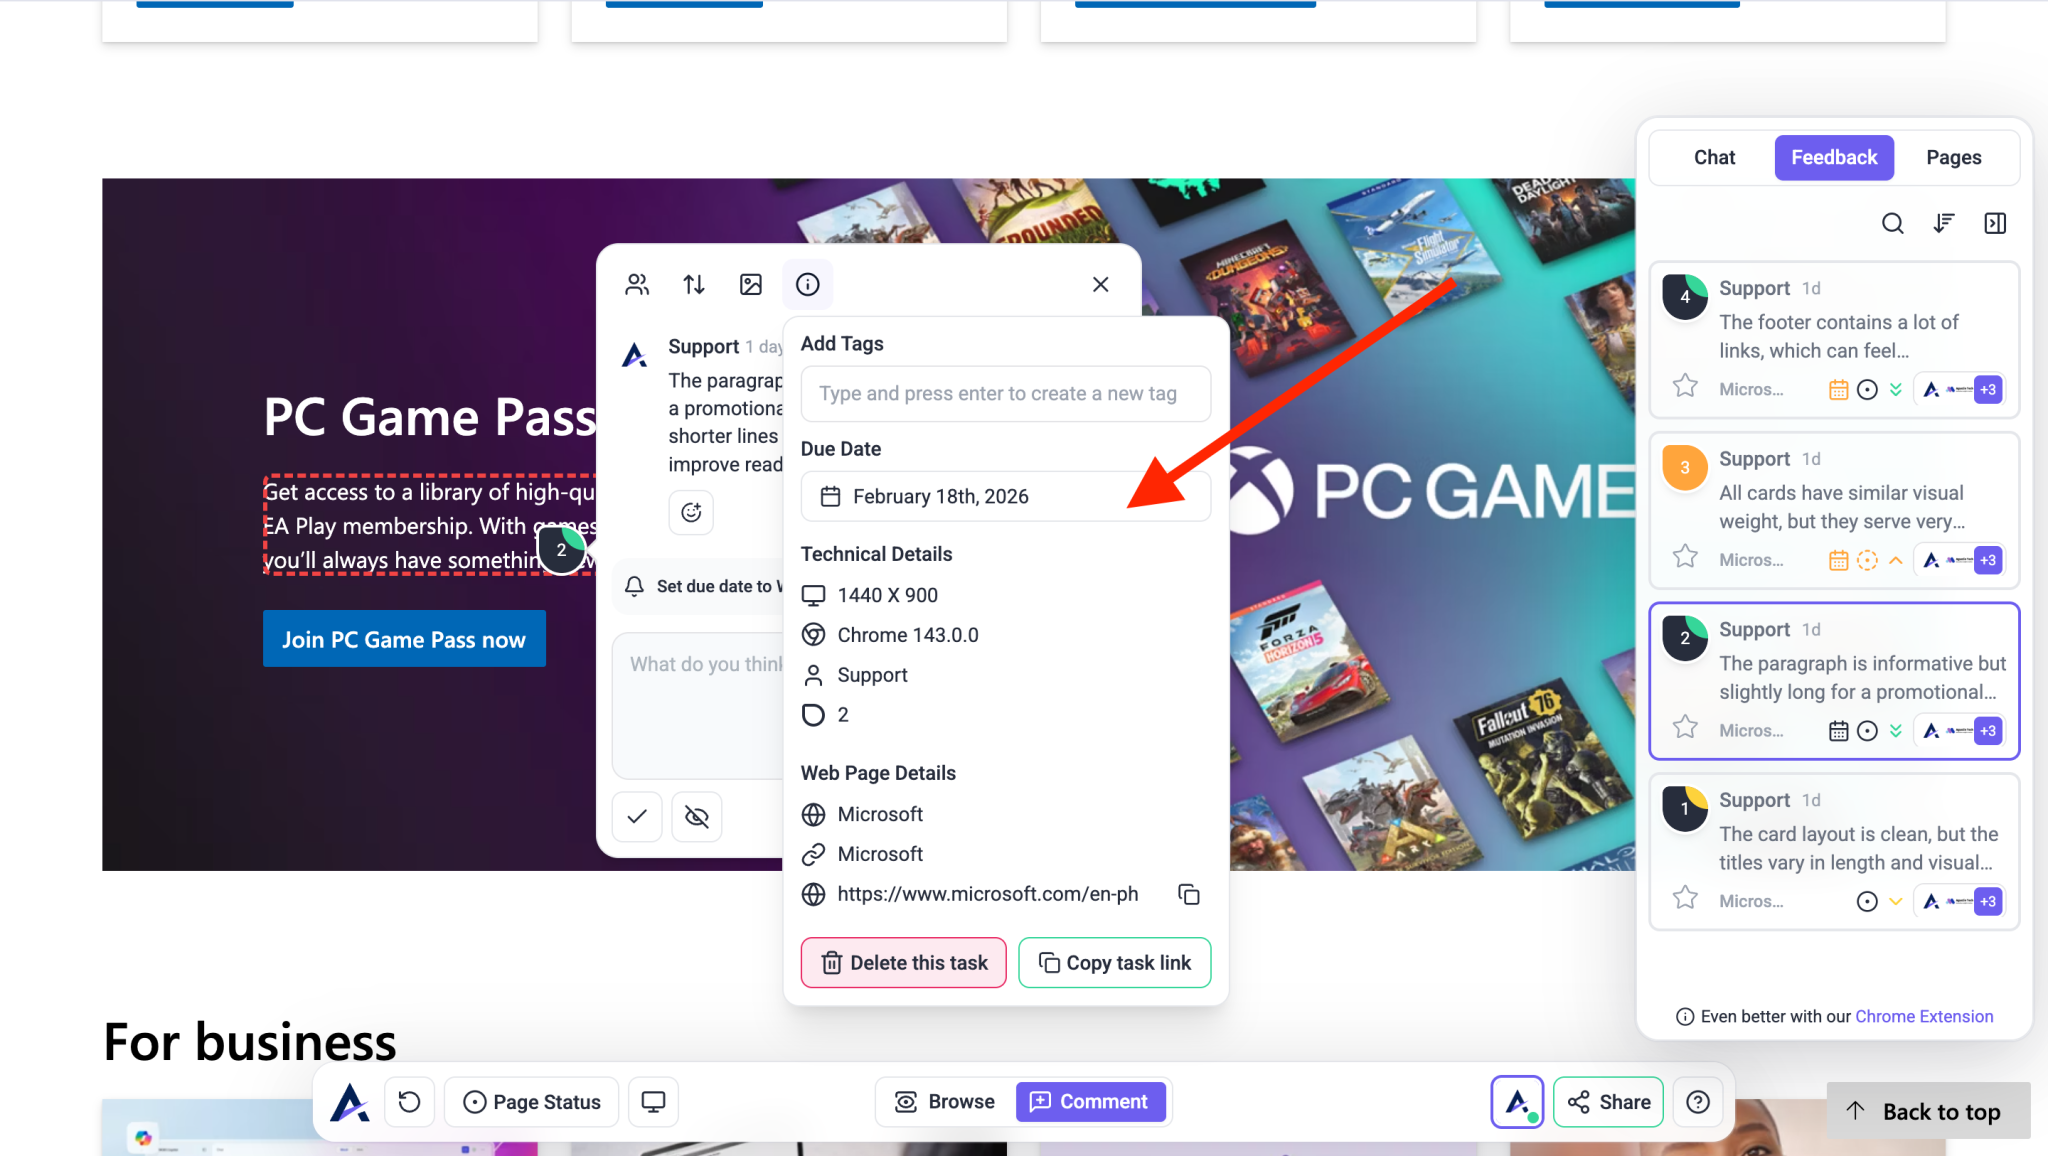
9. Set Task Due Date
Adding a due date helps your team stay on track and ensures tasks are completed on time. You can assign or update a due date from any task view.
Instructions:
- The due date will be saved automatically and visible to all team members.
- Open the task from the Inbox, Boards, or Collaborate view.
- In the task panel, locate the Due Date field (usually in the sidebar or task details section).
- Click on the calendar icon or date field to open the date picker.
- Select your desired due date from the calendar.


Task Color Based on Due Date
Atarim automatically changes the task color based on how close or overdue a task is:
- Default (No color): The task is not near its due date.
- Orange: The task is approaching its due date (within a few days).
- Red: The task is overdue — the due date has already passed.


Tip: These color indicators help you and your team quickly prioritize what needs attention.
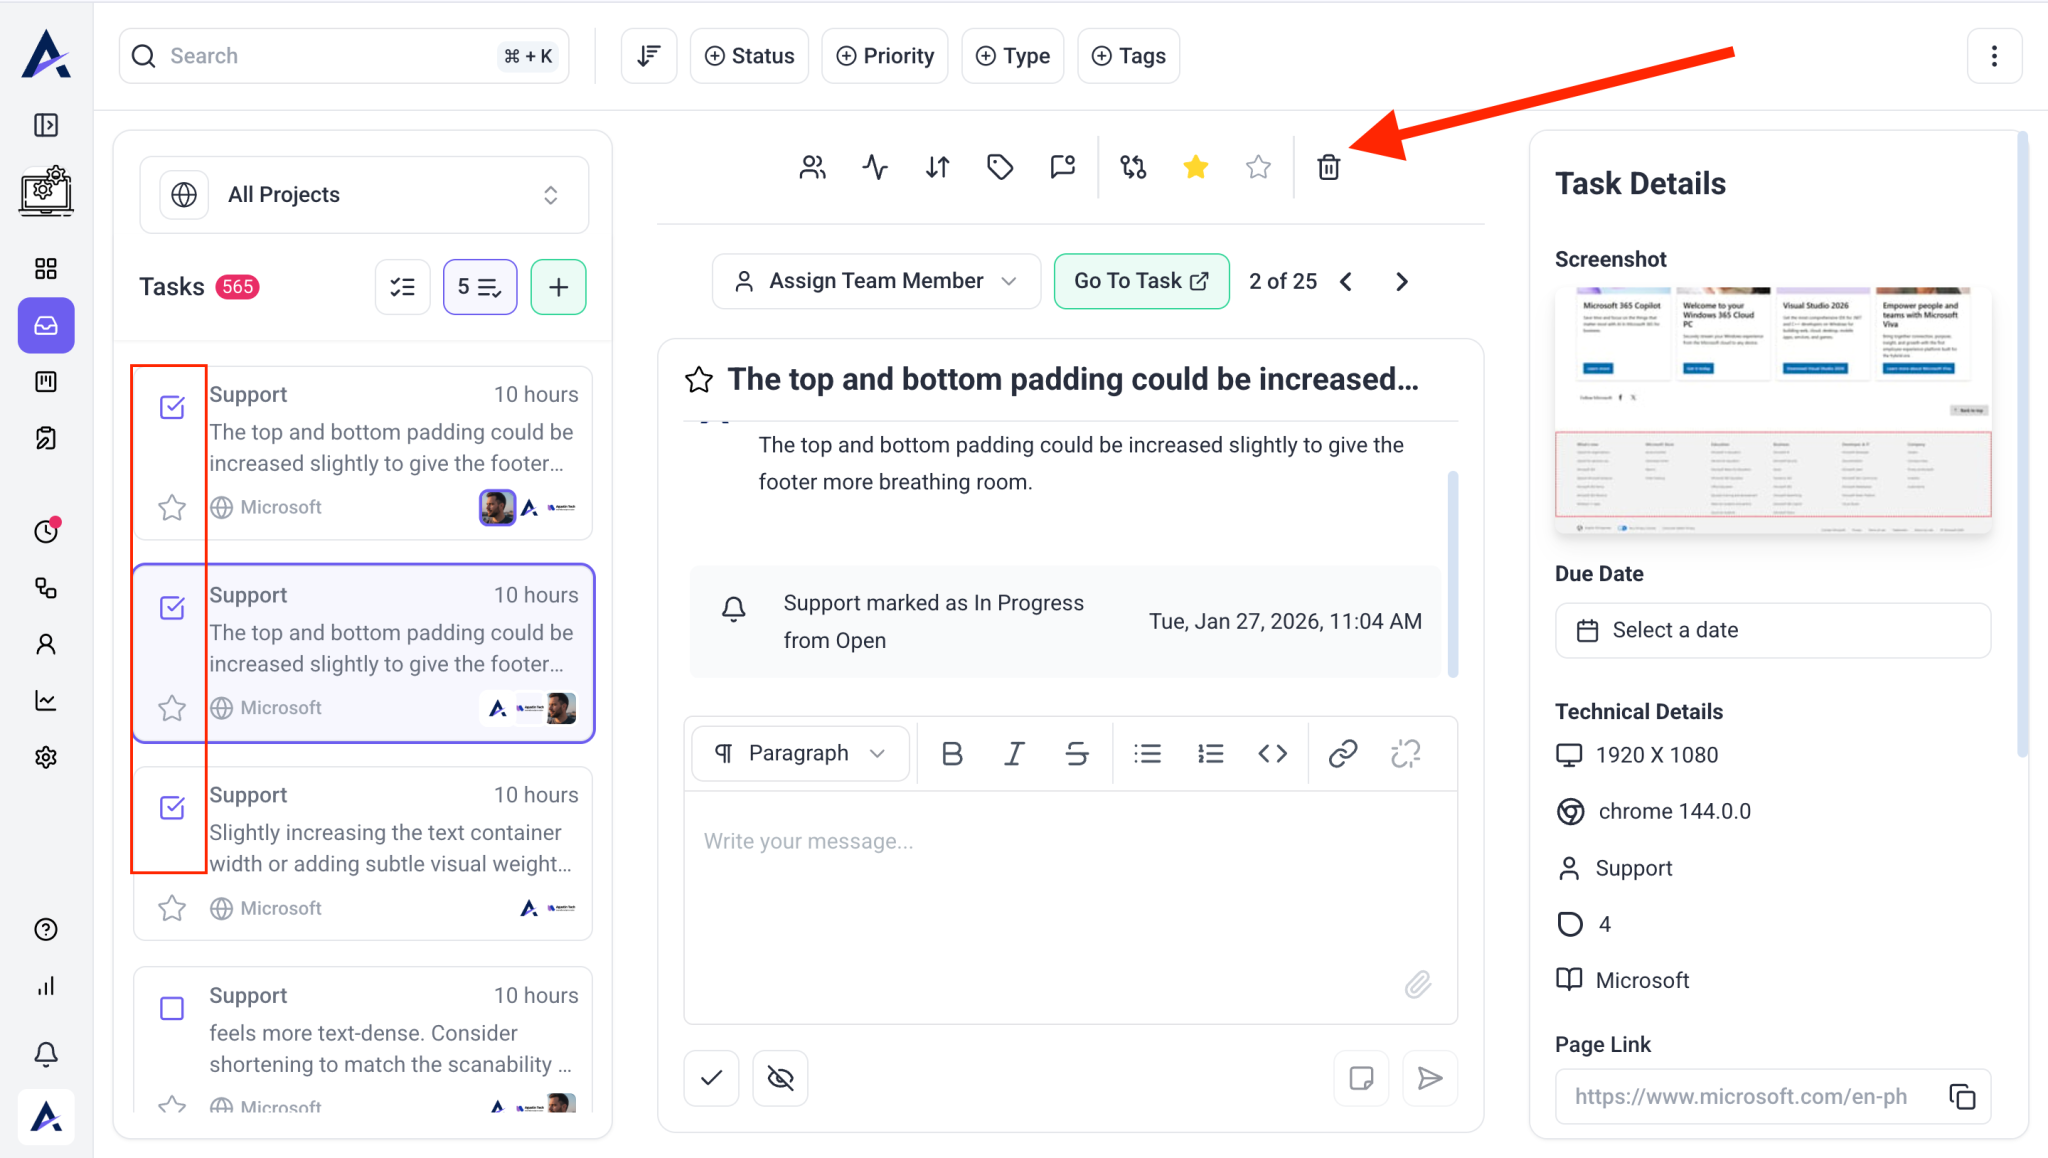
10. Delete a Task
Permanently remove tasks you no longer need.
From the Inbox or Boards View
Instructions:
- Open the task panel from Inbox, Board, or Collaborate view.
- Click the trash icon
- Confirm the deletion when prompted
From the Collaborate (Visual) View
- Open the task from the Collaborate (Visual) View.
- Scroll to the bottom of the right-hand sidebar.
- Under Technical Details, click the red 🗑️ Delete this task button.
- Confirm the deletion when prompted.


Note: Deleted tasks cannot be recovered, so proceed with caution.
Bulk Actions in the Atarim Inbox
Inside your Email Inbox in Atarim, you can also select multiple emails and perform bulk actions — making it faster and easier to manage communication across projects and tasks.
Once you’ve selected multiple emails, you can apply any of the following actions:
- Change Status – Set all selected emails to statuses like Open, In Progress, Waiting for Reply, or Completed.
- Change Priority – Adjust urgency levels (e.g. Low, Medium, High, Critical) in one click.
- Add Tags – Organize your emails by topic, project, or custom workflow labels using tags.
- Bookmark – Mark important emails so they’re easy to access later.
- Delete – Clean up your inbox by removing multiple emails at once.
Instructions:
- Go to your Inbox in the Atarim Dashboard.
- Click on Select Multiple Tasks at the top of the inbox.
- Select the emails or tasks you want to include using the checkboxes.
- Once selected, a toolbar will appear with bulk action options.
- Choose your desired action:
- Change Status
- Set Priority
- Add Tags
- Bookmark
- or Delete
- Your selected action will be applied to all the chosen emails instantly.


FAQs
Yes, tasks can be assigned to multiple team members.
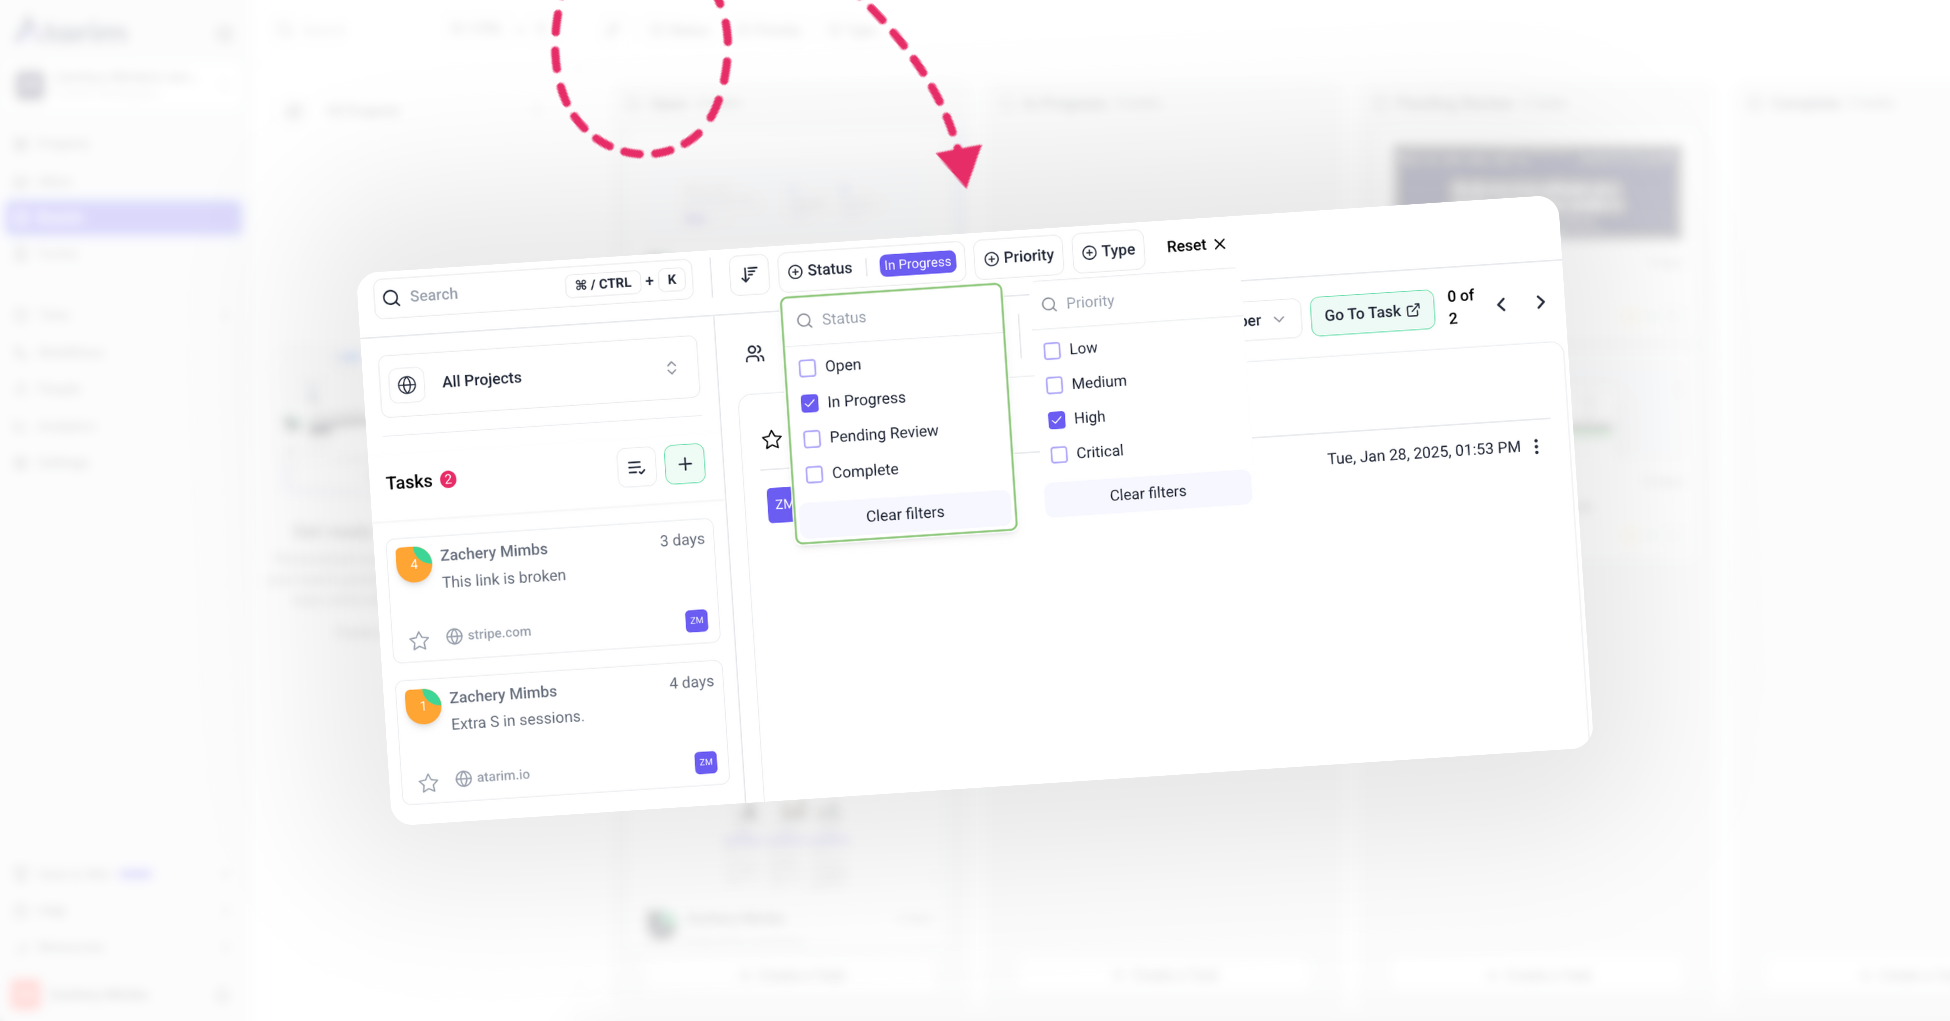
Yes, Atarim offers advanced filtering options. Navigate to the Boards or Inbox, and use the filters to sort tasks.
No, it is not possible to archive task.
Yes, you can attach the files to task.
Clients can view and comment on tasks but cannot typically update statuses or edit details unless explicitly granted permissions.
Yes, you can export tasks for reporting or sharing. Go to the Boards or Inbox, and use the Export option to download task data as a CSV or Excel file.